How to Sharpen a Knife: Complete Knife Maintenance Guide
A dull knife isn't just annoying to use. It's more dangerous. Dull blades slip. They crash through things instead of slicing clean, which means more force, more pressure, and more room for something to go wrong at the worst possible moment.
Maintenance protects more than how the knife performs day to day. It protects whatever you spend on it. A well-built blade, cared for properly, can last decades — genuinely, decades. Neglect one and even great steel starts failing within a year or two. And knives don't all wear the same way. A folding EDC knife breaks down differently than a kitchen knife does, so the care each one needs looks different too.
This guide gets into the hands-on parts: sharpening, cleaning, and the habits that keep a blade working the way it should.
A Quick Safety Note
A few habits keep sharpening and cleaning safe, not just effective. Always cut and sharpen away from your body, never toward it. Keeping fingers clear of the edge when testing sharpness or wiping down a blade — a cloth wrapped around the spine, moving from spine to edge, is safer than wiping directly along the edge itself. And when using a whetstone or sharpener, secure it on a stable, non-slip surface so it can't shift mid-stroke. None of this takes extra time, but skipping it is how a straightforward maintenance task turns into an actual injury.
Why Knife Maintenance Matters
An edge doesn't hold itself. Every single cut wears it down a little, and that wears pile up until you've got a blade dragging through things it used to glide through.
Keeping that edge intact is really the whole point of maintenance. A sharp knife does the job with less effort, whether that's an hour of vegetable prep or field dressing something outdoors. Beyond the edge, regular care keeps corrosion away — moisture sitting on steel, carbon steel especially, kicks off rust fast, and rust is a lot easier to stop before it starts than to fix afterward. It protects everything else too. Handles. Pivots. Whatever hardware is holding a folder together.
All of it adds up to a knife that just lasts longer. One maintained consistently will outlast a neglected one by a wide margin, often years. And there's a safety piece running underneath all of this — a knife that's been properly cared for behaves predictably. You know what you're going to get from it.
How to Sharpen a Knife
Sharpening is really where the skill lives in all of this. A few methods exist, and which one makes sense depends on the situation.
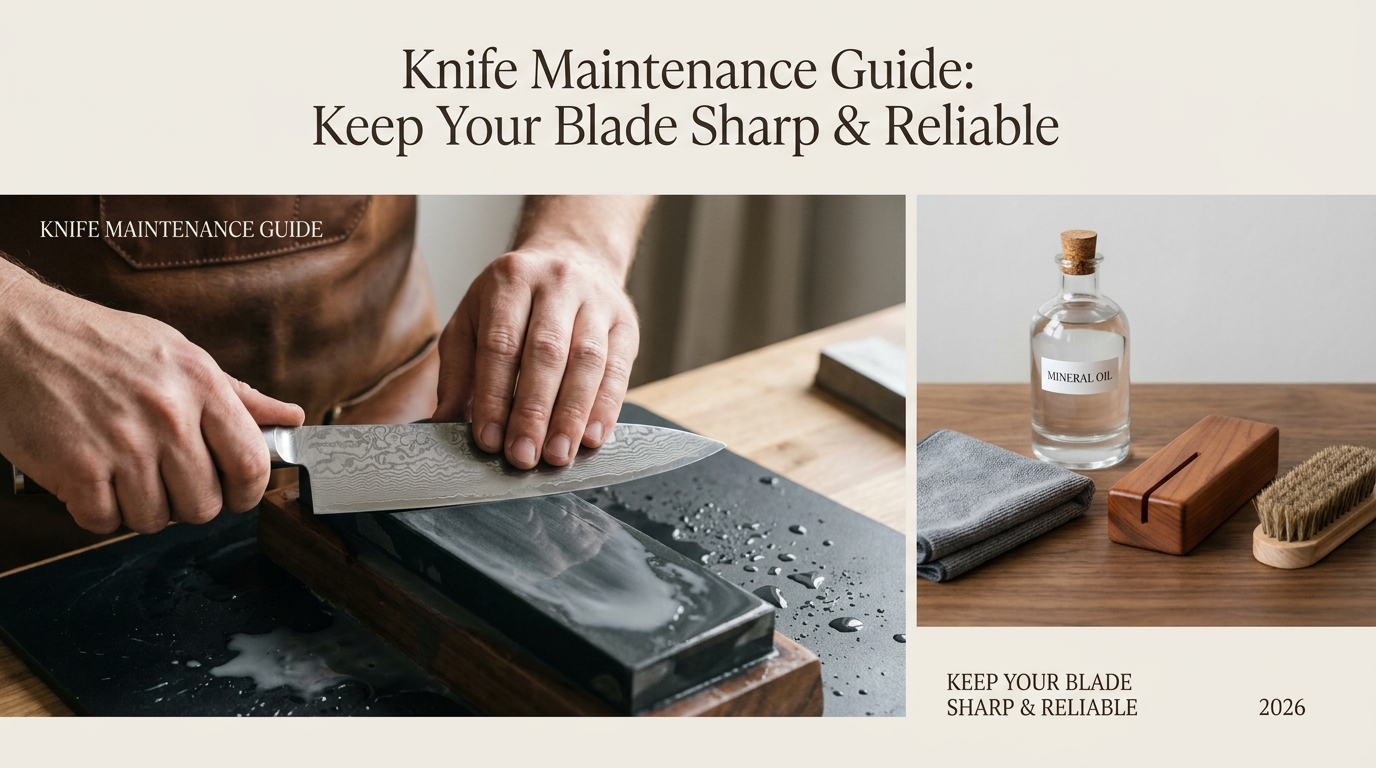
Using a Whetstone
Nothing gives you more control than a whetstone. It just takes some practice before it feels natural.
Soaking Stones vs. Splash Stones
Not every whetstone gets used the same way, and using the wrong method for a given stone is a common early mistake. Soaking stones, usually the coarser water stones, need to sit submerged in water for 10–15 minutes before use — you'll know they're ready once bubbles stop rising to the surface. Splash stones, often the finer grits, just need a quick splash of water on the surface as you work, rather than a full soak.
Using a splash stone that's been oversoaked can make it too soft and cause it to wear down unevenly, so it's worth knowing which type you're working with before you start.
Grit Choice: Coarse, Medium, and Fine
Grit choice matters more than most people assume going in. Coarser stones, somewhere in the 200–600 range, are for fixing a genuinely damaged or very dull edge — think chips, rolled edges, or a blade that's been badly neglected. This grit removes material fast, which is exactly what a damaged edge needs, but it's not where you want to spend time on a knife that's only slightly dull.
Medium grits, 1000 to 3000 or so, cover regular sharpening and are where most maintenance sharpening happens. Anything above 4000 is for polishing an edge that's already mostly there, refining what the medium grit already established rather than doing any real correction.
A good rule of thumb: start at the lowest grit the edge needs, and don't skip straight to a fine stone hoping it'll fix a genuinely dull blade. It won't — fine grits polish, they don't repair.
Burr Formation
As you sharpen, a small ridge of displaced metal — the burr — forms along the opposite side of the blade from whichever side you're working. This is a good sign, not a mistake. A burr means the stone has fully apexed the edge on that side, which is exactly what needs to happen before you switch sides. You can usually feel a burr by very lightly running a finger (carefully, away from the edge itself) along the opposite face of the blade — it feels like a faint, rough wire.
Removing the Burr
Once you've formed a burr on one side and then the other, it needs to be removed rather than left on the blade, since a burr left in place makes the edge feel sharp initially but fails fast under real use. Light, alternating strokes on progressively finer grits usually knock the burr off cleanly. Some sharpeners finish with a few exceptional light passes on a strop or a fine stone at a slightly higher angle specifically to clear any remaining burr without re-forming a new one on the other side.
Testing Sharpness
A few simple tests confirm whether an edge is done. The paper test — slicing through a sheet of printer paper with light pressure — should produce a clean cut with no tearing or snagging if the edge is genuinely sharp. The fingernail test works too: resting the edge lightly on a fingernail at a slight angle, a sharp blade will "bite" and hold rather than slide off. Avoid testing sharpness on your skin or by feel alone — it's less reliable and more likely to result in an accidental cut than either of the tests above.
Common Beginner Mistakes
A few mistakes show up constantly with anyone new to stone sharpening. Pressing too hard is the most common — heavy pressure doesn't sharpen faster; it just removes more material than necessary and makes the angle harder to control. Changing the angle mid-stroke is another, since even small angle shifts create an uneven edge rather than a clean one. Skipping grits, jumping straight from a coarse stone to a fine one, leaves scratches and unevenness that the fine grit alone can't fully smooth out. And rushing the burr removal step, which we covered above, is what leaves a blade feeling sharp for a day and then falling off fast after that.
Angle Guides
Holding a consistent angle freehand takes real practice, and there's no shame in using a guide while that skill develops. Angle guides — small clip-on tools that attach to the spine of the blade — hold the knife at a fixed angle relative to the stone, removing the guesswork while you build a feel for what the correct angle looks and feels like. Most guides are adjustable across the common 15–20 degree range most knives sharpen at. Even experienced sharpeners sometimes use a guide for particularly important or expensive blades, where consistency matters more than speed.
Stone Flattening
Maintaining the stone.
Since it wears unevenly over repeated use — a coarse stone in particular. If left unaddressed, this uneven wear, usually a slight dishing in the center, creates a slightly curved sharpening surface, which quietly throws off angle consistency without you necessarily noticing why your edges suddenly feel off. A flattening stone, sometimes called a lapping plate, corrects this by grinding the sharpening stone back to a flat, even surface. Doing this every so often, more often for stones used heavily, keeps sharpening results consistent over the stone's lifespan rather than letting it slowly warp out of true.
| Grit Range | Use Case |
| 200–600 | Repairing damaged or very dull edges |
| 1000–3000 | Regular sharpening |
| 4000–8000 | Polishing and edge refinement |
| 8000+ | Mirror polish, rarely needed day to day |
Prepping the stone usually means soaking a water stone for 10–15 minutes or adding a bit of honing oil if it's an oil stone. Skip this and a dry stone just clogs faster and cuts worse. Not worth skipping.
Angle is the single biggest factor in how the edge turns out. Most knives land somewhere between 15 and 20 degrees per side, though that shifts depending on the blade and for what it’s. What matters more than the exact number is keeping that angle consistent stroke after stroke — that's what produces a clean edge instead of a ragged one.
| Knife Type | Recommended Sharpening Angle (Per Side) | Ideal Use |
| Kitchen Knives | 15–17° | Fine slicing, chopping, and precision food preparation |
| EDC & Pocket Knives | 15–20° | Everyday tasks with a balance of sharpness and durability |
| Hunting Knives | 18–22° | Field dressing, camping, and demanding outdoor use |
| Damascus Knives | 15–18° | Precision cutting while maintaining the blade's refined edge |
| Heavy-Duty & Outdoor Knives | 20–25° | Tough cutting tasks where edge strength is the priority |
Both sides need equal attention too. Switch sides every few strokes so you're not building up a burr on just one edge. A blade like that can feel sharp for a minute and then fall apart under real use.
Finish with a finer stone. It clears whatever burr is left and leaves a cleaner surface behind.
Using a Honing Rod
Honing and sharpening get used interchangeably a lot, but they're not the same thing at all.
Honing straightens a blade's edge — realigns the microscopic bends that build up from regular use, without taking off any steel. Sharpening removes material to form a genuinely new edge. If a knife's just gotten a little dull from normal use, honing's usually enough. If it's lost its edge, that calls for real sharpening.
Rods are most often used. Some people hone before every use on knives that see heavy daily work, since the whole point here is keeping the edge aligned, not restoring it. Run the blade along the rod at a steady angle, a handful of strokes each side, and that keeps things straight between the real sharpening.
Using a Knife Sharpener
Manual and electric sharpeners both speed things up compared to freehand stone work. Neither is quite as good, though, in different ways.
Manual pull-through sharpeners are cheap and simple. Fine for basic kitchen knives that don't need much refinement. Electric sharpeners move faster and stay more consistent if you're maintaining several knives regularly. Neither one gives you the control a stone does, and both tend to strip more material per pass than careful stone work would. For anything premium — a good Damascus blade, say — that extra material loss is worth avoiding if you can.
| Method | Control | Speed | Best For |
| Whetstone | Highest | Slowest | Premium knives, Damascus blades, precision work |
| Honing Rod | Moderate | Fast | Regular edge maintenance between sharpening |
| Manual Sharpener | Low | Fast | Basic kitchen knives, quick touch-ups |
| Electric Sharpener | Low–Moderate | Fastest | Frequent maintenance across multiple knives |
How to Know When Your Knife Needs Sharpening
A blade doesn't just go dull overnight. It happens slowly, gradually enough that it's easy to miss until the difference is undeniable.
A few things tend to give it away. Struggling to cut through something that used to be easy is usually the first sign. Crushing instead of slicing — a tomato that gets squashed rather than sliced clean — means the edge has lost its bite. Slipping while cutting is more serious, since a dull blade needs more pressure, and more pressure means less control if it skips off whatever you're working on. Uneven cuts, where the blade seems to wander unpredictably, often point to an edge worn down unevenly. And if you're pushing harder than usual on something routine, that's usually the clearest sign of all.
| Knife Type | Typical Sharpening Frequency | Recommended Maintenance |
| Kitchen Knives | Every 1–2 months with regular use | Hone frequently and sharpen as needed to maintain peak performance |
| EDC & Pocket Knives | Every 2–3 months | Sharpen based on daily use and the materials being cut |
| Hunting Knives | Before and after each hunting trip | Keep the edge ready for field use and inspect after heavy tasks |
| Folding Knives | Every 2–4 months, depending on use | Clean the pivot regularly and sharpen when cutting performance declines |
| Damascus Knives | Every 2–3 months with careful sharpening | Use gentle sharpening techniques to maintain the blade's finish and appearance |
Note: These timelines are general recommendations. Actual sharpening frequency depends on how often the knife is used, the materials it cuts, and how well it is maintained between sharpening sessions.
How to Clean a Knife
Cleaning a knife isn't complicated. Rushing it, though — or skipping steps — is exactly how rust and edge damage creep in over time without anyone noticing until it's already happened.
Step 1: Remove Residue. Clear off whatever's left on the blade first. Food, dirt, general debris, whatever the knife just went through. Do this right after use. Wait too long and residue dries on, and dried-on residue is a lot more work to deal with than fresh residue.
Some residue needs a bit more than soap and water, though. Tree sap tends to stick stubbornly once it dries — a small amount of rubbing alcohol on a cloth usually breaks it down without needing anything abrasive on the blade. Blood, especially on a hunting knife after field dressing, should get rinsed off with cold water first rather than hot, since heat can set the residue rather than lift it. Once it's rinsed, a normal wash finishes the job. Adhesive residue — from stickers, tape, or packaging — usually comes off with a bit of the same rubbing alcohol, or a dedicated adhesive remover if the residue is stubborn. None of these need harsh scrubbing; a soft cloth and a bit of patience to do the work.
Step 2:Wash Properly. Mild soap and warm water handle everything. Skip harsh chemicals and abrasive cleaners entirely — they strip protective coatings and can mess up certain finishes. And the dishwasher? Never. Heat, moisture, and detergent all at once is rough on both the blade and whatever the handle's made of. It's one of the fastest ways to ruin a knife that's worth keeping.
Step 3: Dry Completely. People underrate this step constantly. Even a few minutes of standing moisture on an unprotected blade, carbon steel especially, is enough to kick off rust. Dry means not corroding. Simple as that.
If rust has already shown up — small orange or brown spots on the blade — it's worth addressing early rather than letting it spread. A paste of baking soda and water, worked gently over the spot with a soft cloth, lifts light surface rust without damaging the steel underneath. For anything more stubborn, a fine-grit abrasive made specifically for rust removal works, though it's worth going gently and stopping the moment the spot lifts, since aggressive scrubbing can scratch the surrounding finish.
Step 4: Apply Protective Oil. A light coat after drying adds a real layer of protection against moisture, especially useful if the knife's going into storage for a while or just doesn't get used daily. This step gets skipped constantly, and it's genuinely one of the cheapest ways to add years to a blade's life.
Not all oils are equal here, either. Food-safe mineral oil is the standard choice for kitchen knives, since it protects the blade without introducing anything you wouldn't want near food. Camellia oil is a traditional option favored for carbon steel and Damascus blades specifically — it's light, doesn't turn rancid over time the way some other oils can, and does a genuinely good job protecting against oxidation without leaving a heavy residue behind.
For folding knives, don't stop at the blade. Pivot lubrication matters just as much as blade oiling, since a dry pivot leads to stiff, gritty action and eventually real wear on the mechanism itself. A drop of knife-specific lubricant worked into the pivot, opened and closed a few times to distribute it, kept the action smooth and protects the joint the same way oil protects the blade.
| Knife Type | Key Maintenance Focus |
| Damascus Knives | Preventing oxidation, regular oiling, dry storage |
| Folding Knives | Pivot cleaning, lubrication, checking screws, and locks |
| Pocket Knives | Clearing debris, folding mechanism care, hardware checks |
| Kitchen Knives | Regular sharpening, proper cutting surfaces, safe storage |
| Hunting Knives | Post-use cleaning, moisture removal, blade protection |
Damascus Knife Maintenance. That layered pattern people love is also the thing that needs the most protecting. Oxidation matters more here than on a plainer blade since the contrast in the pattern can fade or dull if it's left exposed to moisture too long. Regular oiling and dry storage keep both the performance and the look intact.
Folding Knife Maintenance. The pivot gets the most attention, easily. Clean it regularly to clear out lint and debris that builds up without you noticing. Lubricate the moving parts so the action stays smooth instead of stiff or gritty. Check screws and locks now and then since regular opening and closing loosens things gradually.
Pocket Knife Maintenance. The same idea as folding knife care, just with more attention to whatever's accumulated from riding around in a pocket all day. Clear the debris, keep the mechanism moving freely, check the hardware. Skip this and a daily carry knife starts feeling stiff and gritty faster than you'd expect.
Kitchen Knife Maintenance. Sharpening matters more here than anywhere since a kitchen knife sees more repeated use than any other blade in the house. Cut on wood or soft plastic, not glass or stone — those wreck an edge fast regardless of how good the steel is. Store it in a block or on a magnetic strip so it isn't getting nicked by other utensils in a drawer.
Hunting Knife Maintenance. These take more abuse in a single trip than most knives see in months — dirt, moisture, sometimes blood, all at once. Cleaning after outdoor use isn't optional the way it might be for a knife that mostly just sits in a drawer. Get the moisture off as soon as you can, then oil it. That offsets whatever it just went through in the field.
Maintenance by Steel Type
Knife type isn't the only thing that changes maintenance needs — the steel itself matters just as much.
Damascus Steel
Needs the most consistent attention of the group, to protect the pattern itself. Regular oiling and dry storage prevent the oxidation that dulls the contrast between layers over time.
Carbon Steel
Prone to rust faster than other steels if left wet, even briefly. Carbon steel benefits from oiling more frequently than stainless and drying it immediately after washing matters here than with almost any other steel type.
Stainless Steel
The most forgiving of the group. Still benefits from occasional oiling but tolerates brief moisture exposure and infrequent maintenance far better than carbon steel or Damascus.
Tool Steel
Tough and fairly low maintenance, though it can still corrode under prolonged moisture exposure. Regular cleaning and occasional oiling keep it performing well, particularly on blades that see heavy outdoor use.
Knife Maintenance Tools
A basic kit doesn't need to be elaborate. It just needs to cover the actual bases.
| Tool | Purpose |
| Whetstones | Primary tool for sharpening and edge restoration |
| Honing Rods | Quick edge alignment between full sharpening |
| Knife Oil | Prevents corrosion, protects blades, and pivots mechanisms |
| Cleaning Cloths | Regular wipe-downs and drying after use |
| Sharpening Guides | Help maintain a consistent angle for less experienced sharpeners |
| Storage Solutions | Sheaths, blocks, or cases that protect the edge during storage |
None of this costs much on its own. Together, though, it covers everything a knife needs across years of regular use.
Common Knife Maintenance Mistakes
A few habits are behind most of the premature wear knives go through.
Wrong sharpening angle tops the list — inconsistent angle wears an edge unevenly instead of restoring it. Sharpening too hard, taking off more material than necessary, eats into a blade's lifespan over repeated sharpening. Harsh chemicals during cleaning can strip finishes and damage coatings. Leaving a blade wet, even for a few minutes, is one of the fastest routes to visible rust on unprotected steel. Storing knives loose, without a sheath or guard, invites nicks that are completely avoidable. And cutting on glass or stone dulls an edge far faster than a wood or plastic board would, no matter how good the steel underneath is.
Signs of Incorrect Sharpening
A few visual and physical cues show up when sharpening's gone wrong and catching them early prevents more serious damage down the line.
A rounded edge happens when the angle drifts higher over repeated sharpening, gradually rounding off what should be a crisp bevel — the edge looks soft rather than defined, and cutting performance drops even though the blade's been "sharpened." An **uneven bevel** shows up as an edge that's visibly wider or narrower along different parts of the blade, usually from inconsistent pressure or angle during sharpening.
A **wire edge** is a burr that never got carefully removed — it can feel sharp initially but folds over almost immediately under real use, leaving the edge dull again fast.
**chipped edge** points to either too aggressive an angle for the knife's intended use or a genuinely brittle blade meeting a harder material than it should have.
And a **scratched blade**, especially deep or crosswise scratches on the flat of the blade, usually comes from using too coarse a grit for too long, or from sharpening at an inconsistent angle that drags the stone across the face rather than just the edge.
Spotting any of these early is usually fixable with more careful technique. Left unaddressed, they tend to compound over successive sharpening.
Knife Maintenance Schedule
Building this into an actual routine, rather than doing it whenever you happen to remember, is what keeps a knife performing well over the long haul.
After every use: Clean it, dry it fully, store it somewhere safe.
Weekly or monthly: Check the blade's condition, check hardware for any looseness, oil it if it needs it.
When required: Sharpen once the edge starts showing signs of dulling and give folding mechanisms a deeper clean if they start feeling stiff or gritty.
| Frequency | Tasks |
| After every use | Clean, dry, store safely |
| Weekly / monthly | Inspect blade, check hardware, oil if needed |
| When required | Sharpen blade, deep clean folding mechanisms |
Storage Tips
- Dry before storing: Only place a knife in a leather sheath once the blade is completely dry. Moisture trapped inside the sheath can lead to rust.
- Avoid loose storage: Don't leave knives loose in drawers, where the blade can become damaged or dull from contact with other utensils.
- Protect kitchen knives: Use a blade guard if storing kitchen knives outside a knife block or magnetic strip.
- Maintain folding knives: Keep folding knives clean and apply a light lubricant to the pivot to ensure smooth operation.
- Store in a dry place: A cool, low-humidity environment helps protect the blade and extends the life of your knife.
Knife Maintenance vs Knife Care
These two get used interchangeably, but they're really covering different grounds.
Maintenance, which is what this guide is mostly about, is hands-on, mechanical side — sharpening, pivot lubrication, edge restoration, repairs. Care leans more toward everyday protection — storage habits, cleaning routines, how a knife gets managed between uses. That side gets covered in more depth on our knife care page.
Maintenance is what keeps a knife performing. Care is what keeps it protected day to day. Most owners end up doing a bit of both without really separating the two in their head, and that's fine. They just serve slightly different purposes.
Frequently Asked Questions
How often should I sharpen my knife?
Depends on how much it's used, but most knives need it every few months under regular use. Sooner if it's suddenly taking more effort to cut off than it used to.
How do I sharpen a knife at home?
A whetstone gives the most control. Pick the right grit, hold a consistent angle around 15–20 degrees per side, sharpen both sides evenly, then finish with a finer grit to polish it up.
What angle should I sharpen my knife?
Somewhere between 15 and 20 degrees per side works for most knives, though it shifts a bit by blade type. Staying consistent matters more than nailing an exact number.
How do I clean a knife properly?
Clear off residue, wash with mild soap and warm water, dry it completely, and add a light coat of oil, especially before it goes into storage for a while.
Can I put my knife in a dishwasher?
No. Heat, moisture, and detergent together damage both blade and handle over time. It's genuinely one of the fastest ways to wreck a knife.
How do I maintain a Damascus knife?
Keep it dry, oil it regularly to fight off oxidation, and store it somewhere protected — the pattern fades faster than plain stainless if it gets neglected.
What tools do I need for knife maintenance?
A whetstone or sharpener, a honing rod, some knife oil, a cleaning cloth, and a way to store it protected. That covers most of what a knife will ever actually need.
How often should I oil my knife?
Monthly for knives in regular use, or right after any exposure to moisture. Carbon steel and Damascus blades usually want more frequent oiling than stainless.
Maintenance Tips from Our Craftsmen
A few habits our own craftsmen come back to again when talking to customers about keeping a knife in good shape.
Never scrape food with the knife edge — use the spine or a bench scraper instead, since scraping with the edge dulls it fast and unevenly. Avoid twisting the blade during cutting, particularly with anything dense or resistant, since lateral stress is one of the more common causes of a chipped or cracked edge. Dry carbon steel immediately after washing, not "soon” Carbon steel starts reacting to moisture faster than most people expect. Oil Damascus blades before long-term storage specifically since a Damascus pattern left unprotected for weeks or months is far more likely to show oxidation than one used and maintained regularly. And use wooden or plastic cutting boards rather than glass, stone, or ceramic — this alone probably does more for long-term edge retention than any sharpening routine can make up for afterward.
These aren't complicated habits. They're just the ones that consistently separate a knife that's still performing well in ten years from one that isn't.
Keep Your Blades Performing Like New
A properly maintained knife keeps cutting the way it did on day one, often years longer than one left to feed itself. None of this takes much time. It just must happen, consistently, instead of getting put off.
If you're building out a collection or just looking for the right tools to keep what you've got in shape, our team can point you toward knives built to last and whatever accessories make the upkeep easier.
Latest Posts